
How to Reconstitute Research Peptides
For laboratory research use only. Not for human or veterinary use.
Reconstitution is the first handling step for any lyophilised (freeze-dried) research peptide, and it's where most avoidable errors happen. This guide covers the standard laboratory procedure, the maths behind concentration, and the mistakes that damage material before an experiment even begins.
What reconstitution actually is
Research peptides ship as a lyophilised powder because peptides are far more stable dry than in solution. Reconstitution simply means returning that powder to a liquid state using an appropriate solvent, so it can be measured and used in laboratory work.
What you need
- The lyophilised peptide vial
- A suitable solvent — most commonly bacteriostatic water (contains 0.9% benzyl alcohol, allowing multiple draws over time) or sterile water (no preservative, single-use)
- A sterile syringe with a fine-gauge needle
- Alcohol wipes
- A clean, uncluttered work surface
The procedure
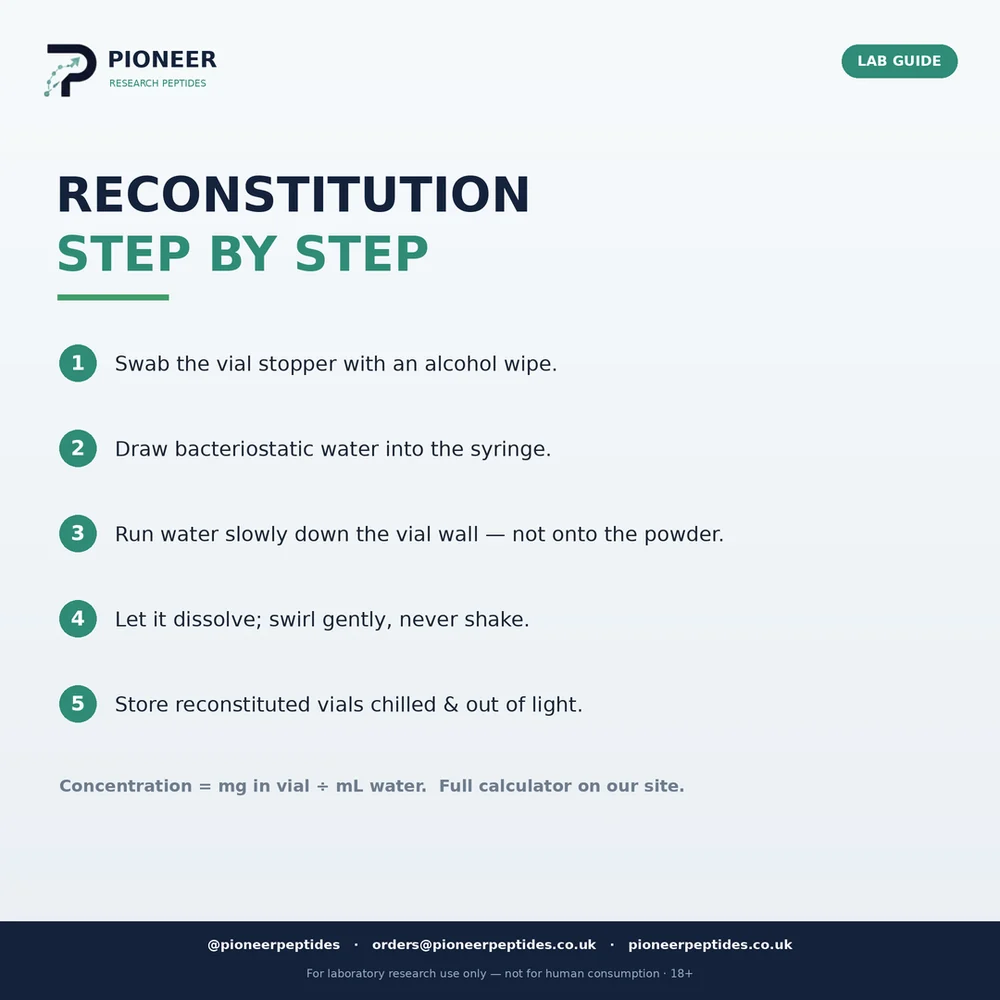
1. Let the vial reach room temperature. Taking a vial straight from 2–8°C storage and adding solvent immediately risks condensation and thermal shock. Allow it to sit for 20–30 minutes.
2. Swab both stoppers. Wipe the rubber stopper of the peptide vial and the solvent vial with a fresh alcohol wipe and let them air-dry. Sterile technique starts before anything is opened.
3. Draw your solvent. Draw the calculated volume of bacteriostatic or sterile water into the syringe.
4. Run the solvent down the inside wall of the vial. This is the step most people get wrong. Angle the needle so the liquid runs slowly down the glass wall rather than jetting directly onto the powder. Peptides are delicate; a direct stream causes foaming and can degrade the material.
Two details that make step 4 easier. Leave a little air in the syringe as you inject and draw an equal volume of air back out as you withdraw — that keeps the vial at atmospheric pressure instead of building a vacuum that fights you on the next draw. And always add solvent to powder, never the reverse: drawing dry powder into a syringe wastes material and you cannot measure what is left behind.
5. Let it dissolve on its own. Most peptides go into solution within a minute or two without any help. If needed, swirl the vial gently.
6. Never shake. Shaking denatures peptides and creates foam. Gentle swirling only.
7. Inspect the solution. A properly reconstituted peptide solution should be clear and free of particulates. Cloudiness or visible material means something is wrong — do not use it.
The concentration maths
The formula is straightforward:
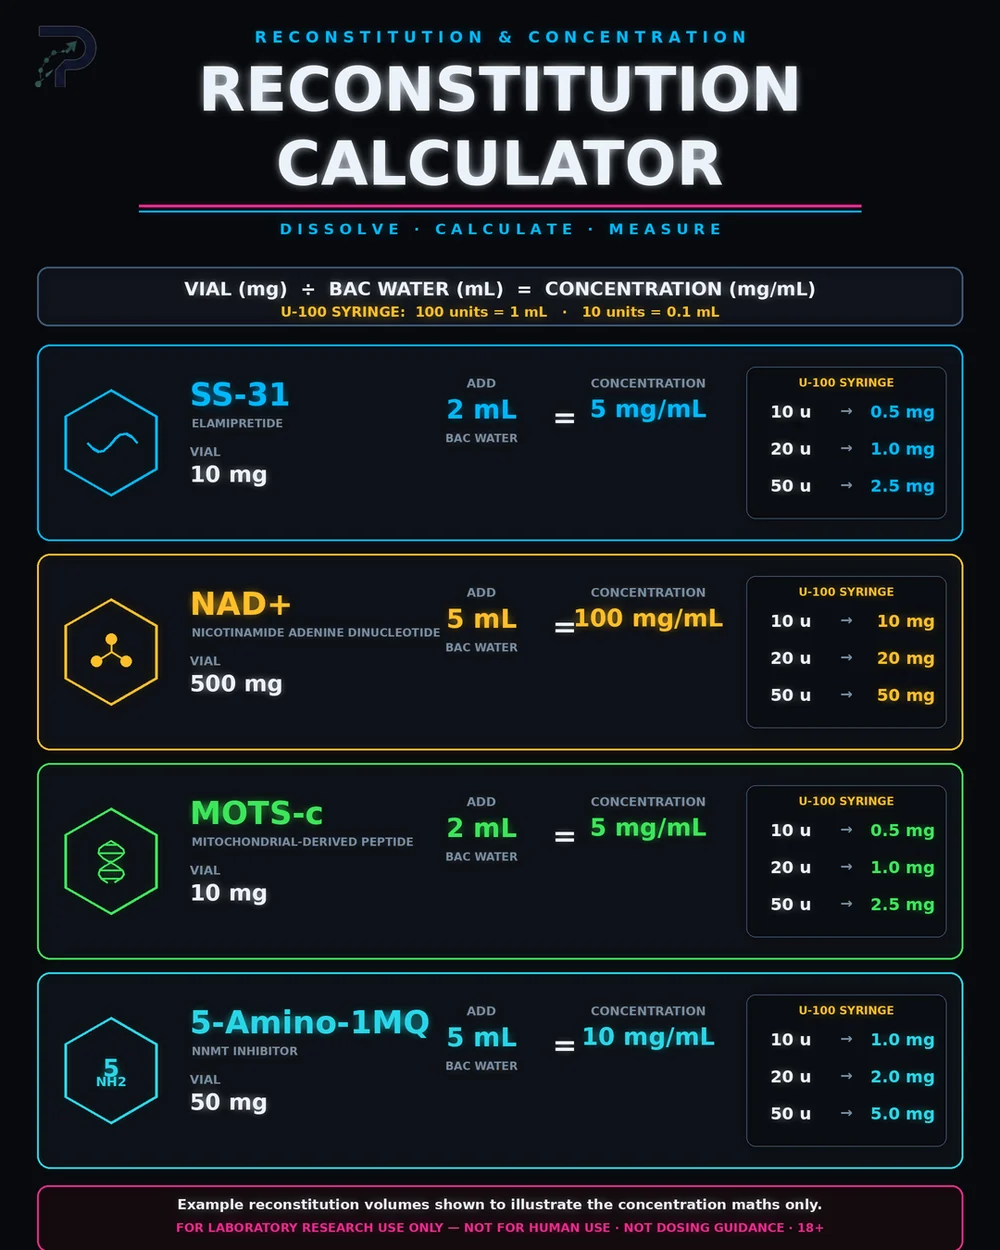
Concentration (mg/mL) = mg of peptide in the vial ÷ mL of solvent added
Worked examples:
| Vial | Solvent added | Resulting concentration |
|---|---|---|
| 5mg | 2mL | 2.5 mg/mL |
| 5mg | 5mL | 1 mg/mL |
| 10mg | 2mL | 5 mg/mL |
| 10mg | 5mL | 2 mg/mL |
Less solvent means a more concentrated solution. Record the volume you used — you cannot work backwards reliably once it's mixed.
We host a live reconstitution calculator on our site that does this maths for every vial size we supply.
Storage after reconstitution
Once in solution, a peptide is far less stable than it was as a powder. Reconstituted material is typically stored at 2–8°C, protected from light, and used within a limited window. Bacteriostatic water allows multiple draws; sterile water does not.
Repeat draws and record keeping
Bacteriostatic water suppresses microbial growth across multiple draws, but that only holds if the technique holds with it. Swab the stopper with a fresh alcohol wipe before every draw, not just the first. Use a fresh sterile syringe each time and never re-use a needle — a blunted needle cores the stopper and drops rubber fragments into the vial.
Write on the vial the moment you reconstitute it: the date, the volume of solvent added, and your initials. It takes five seconds and it is the difference between a labelled solution and an unknown one three weeks later. Record the same in your notes alongside the batch or lot number, so a result can be traced back to a specific certificate if you ever need to.
Keep one ratio across a study. Changing it midway means every concentration calculation before and after belongs to a different series, and comparing them quietly stops being valid.
The five most common mistakes
- Jetting solvent straight onto the powder — causes foaming and degradation.
- Shaking the vial — denatures the peptide.
- Using the wrong water — sterile water for a vial you intend to draw from repeatedly.
- Not recording the volume — you no longer know your concentration.
- Reconstituting cold — condensation and thermal shock.
Quality comes first
None of this technique matters if the starting material isn't what the label says — reconstitution can preserve a good batch, but it cannot improve a poor one. Pioneer compounds are tested by an independent laboratory, and the certificate for each tested batch is published in full with its verification key in the COA library, so you can check the documentation for the vial before it reaches your bench rather than after. The certificate for your batch is also available on request.
Pioneer Research Peptides — UK supplier of research peptides for laboratory use. Independently tested by batch, certificates published with verification keys at the COA library.
For laboratory research use only — not for human consumption. 18+.
Research-grade peptides, documented
Every Pioneer compound is Independently batch tested, with a batch-specific Certificate of Analysis available on request.